


Gears & mechanics STL guides ·
Universal Gear STL: Create a Custom-Size 3D Model
Create a custom-size universal gear STL for your own 3D printer. Check the model controls, measure the fit and buy the generated digital file.
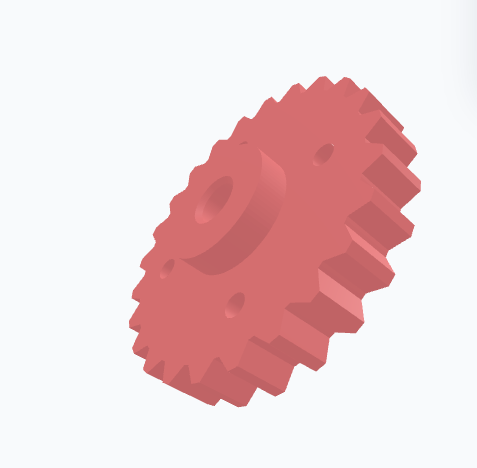
Universal parametric gear for robotics, model making, machinery, conveyor systems, DIY projects, gearbox prototypes and custom applications.
With the Parametric Universal Gear template, you can turn those measurements into a custom-size STL. Review controls such as teeth, pitch diameter, thickness, check your model in the preview and choose the digital file. You buy the generated STL and print it on your own 3D printer, using your preferred filament and slicer settings.
Measurements for your universal gear STL
The product page exposes the following useful geometry controls. Work from your measured parts and check the displayed units and the preview before entering final values.
| Model control | What to check |
|---|---|
| Teeth | Check this feature against the matching component and confirm its effect in the 3D preview. |
| Pitch Diameter | Measure across the circular feature and confirm which mating surface it represents. |
| Thickness | Measure between the two relevant faces and check fit in any receiving slot. |
| Bore d | Measure the mating shaft or fastener and decide what type of fit the opening needs. |
| Hub d | Check this feature against the matching component and confirm its effect in the 3D preview. |
| Hub h | Check this feature against the matching component and confirm its effect in the 3D preview. |
| Tooth Style | Check this feature against the matching component and confirm its effect in the 3D preview. |
Check the mating mechanism before choosing an STL
A mechanism can look right in a picture and still fail to mesh or align. Keep the mating geometry, shaft connection and available axial space together in your notes. Changing a gear or drive component by uniform scaling also changes dimensions that may already be correct. Use the actual model controls and inspect a slow, unpowered trial assembly before considering a working mechanism.
Configure the model, buy the STL and print locally
- Open the universal gear product page and compare the model preview with your application.
- Enter the relevant measurements. Use the units displayed beside each input; convert inch measurements before using a millimetre field.
- Review the complete geometry and keep a record of your parameter values. Check small openings, mating features and remaining wall thickness.
- Choose the digital STL purchase option and review the current price and order details before payment.
- After receiving the STL, open it in your slicer, confirm the imported dimensions and inspect the layer preview before printing.
Configure my universal gear STL
Check a first print before making more
A CAD dimension and a printed dimension can differ. Print a fit sample or one prototype before making a batch, and check the features that contact other parts. Choose print orientation, supports and material for the actual geometry and application. There is no universal clearance or print profile that guarantees the fit on every machine.
Before you choose your STL
Why configure the model instead of scaling a download?
Uniform scaling changes all dimensions together. Here you can work with the available controls, including teeth, pitch diameter, thickness, and check the result before purchase. Keep your input values for later revisions: the downloaded STL contains the final mesh, rather than the original parametric editing history.
What do I buy?
Select the digital STL option for the file you will print yourself. Review the current price and selected configuration before paying. Ordering a finished print is a separate option.
Make the next print fit your project
Have your measurements ready? Open the universal gear template, adjust the model and inspect the preview. When the geometry matches what you need, choose your STL and take it to your own printer.
Next step