


Adapters & connections STL guides ·
Modular roller shutter pass-through STL: Create a Custom-Size 3D Model
Create a custom-size modular roller shutter pass-through STL for your own 3D printer. Check the model controls, measure the fit and buy the generated digital file.
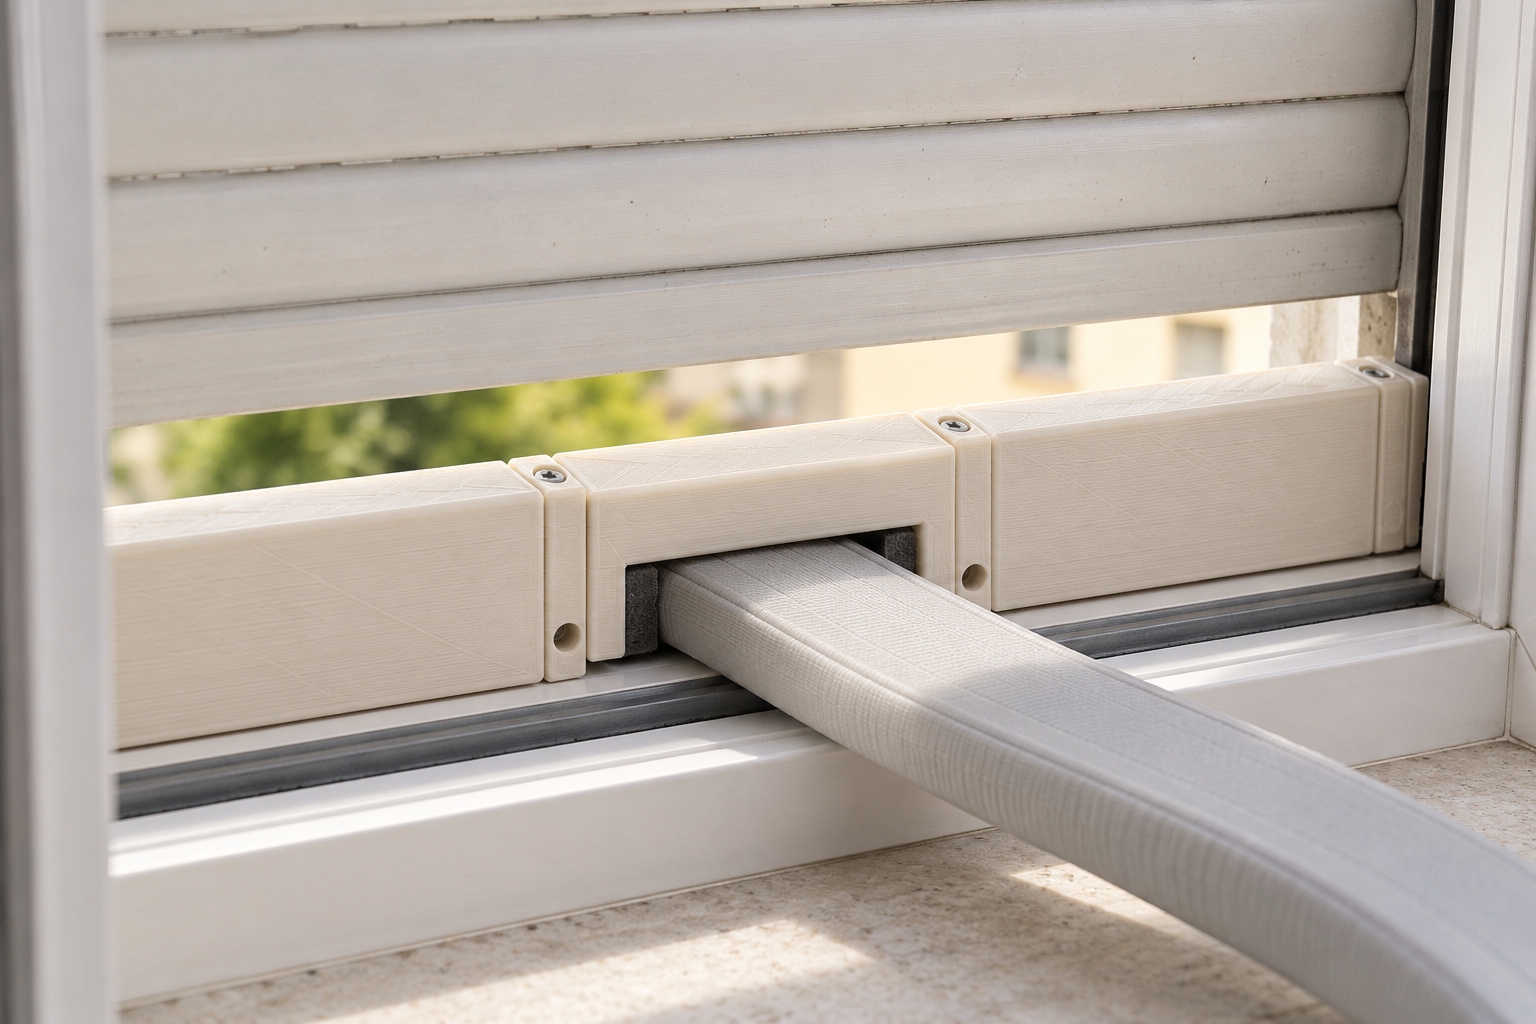
Need to route a portable split AC connecting hose beneath a roller shutter? This insert combines a segmented bar sized to your window with a rectangular hose opening. A removable lid lets you place an already-connected hose inside. Adjust overall width, reduced guide ends and the opening position to suit the installation.
With the Modular roller shutter pass-through for portable split AC template, you can turn those measurements into a custom-size STL. Review controls such as overall width including ends, bar height, bar thickness, check your model in the preview and choose the digital file. You buy the generated STL and print it on your own 3D printer, using your preferred filament and slicer settings.
Measurements for your modular roller shutter pass-through STL
The product page exposes the following useful geometry controls. Work from your measured parts and check the displayed units and the preview before entering final values.
| Model control | What to check |
|---|---|
| Overall width including ends | Measure across the named feature and allow space for the neighbouring parts. |
| Bar height | Measure from the relevant seating surface and check the available vertical clearance. |
| Bar thickness | Measure between the two relevant faces and check fit in any receiving slot. |
| Clear opening width | Measure the object or opening that this internal space must accommodate. |
| Clear opening height | Measure from the relevant seating surface and check the available vertical clearance. |
| Opening position from left | Check this feature against the matching component and confirm its effect in the 3D preview. |
| Maximum segment length | Check both endpoints of the named feature, including its working reach or engagement. |
| Thickness inside guides | Measure between the two relevant faces and check fit in any receiving slot. |
| Reduced end length | Check both endpoints of the named feature, including its working reach or engagement. |
| Joint clearance | Check whether the input adds an allowance or describes the finished opening. Avoid adding it twice. |
| Part to export | Check this feature against the matching component and confirm its effect in the 3D preview. |
| Segment number | Count the repeated features needed and check their overall span in the preview. |
Measurement sequence for this design
- Measure the clear span, internal guide width and engagement on both sides. Calculate the overall width including both ends and fitting clearance.
- Measure the hose cross-section and allow room for movement or soft lining. The inputs describe a clear opening, not an interference fit.
- Locate the opening from the left outer end. Set maximum section length to fit the usable print bed, including the overlap tab.
Confirm the working geometry before buying the file
Compare the pictured shape with the actual task, not only the product name. Mark which faces touch other objects, which parts need to move and which pieces are supplied separately. The model controls change an existing design; they do not automatically add a feature that the template does not include. Check the complete motion or assembly space in the preview before choosing your final dimensions.
Fit and parts supplied separately
For rectangular openings 20–100 mm wide and 6–35 mm high, subject to bar height. This is not an adapter for large round exhaust hoses. The insert must not support the AC unit or an uncontrolled shutter-motor load. Follow the device maker’s hose bend-radius and installation requirements. Weather sealing and thermal performance are unverified; seals and fasteners are separate.
Configure the model, buy the STL and print locally
- Open the modular roller shutter pass-through product page and compare the model preview with your application.
- Enter the relevant measurements. Use the units displayed beside each input; convert inch measurements before using a millimetre field.
- Review the complete geometry and keep a record of your parameter values. Check small openings, mating features and remaining wall thickness.
- Choose the digital STL purchase option and review the current price and order details before payment.
- After receiving the STL, open it in your slicer, confirm the imported dimensions and inspect the layer preview before printing.
Configure my modular roller shutter pass-through STL
Trial-fit the printed geometry
1. Export and print sections 1 to N and the lid separately. The OpenSCAD console reports N and the centre section; 0 exports only the centre section. 2. Use two M3 screws, washers and nuts at each joint. Select screw length for the bar thickness. Tap the lid pilots M3; lid head recesses are Ø 6.6 × 3 mm. 3. Add sealing tape as needed, fit the bar and lay the unbroken hose without strain. Tighten the lid gently. Lower the shutter under control and check that the hose remains clear.
Before you choose your STL
Why configure the model instead of scaling a download?
Uniform scaling changes all dimensions together. Here you can work with the available controls, including overall width including ends, bar height, bar thickness, and check the result before purchase. Keep your input values for later revisions: the downloaded STL contains the final mesh, rather than the original parametric editing history.
What do I buy?
Select the digital STL option for the file you will print yourself. Review the current price and selected configuration before paying. Ordering a finished print is a separate option.
Make the next print fit your project
Have your measurements ready? Open the modular roller shutter pass-through template, adjust the model and inspect the preview. When the geometry matches what you need, choose your STL and take it to your own printer.
Next step