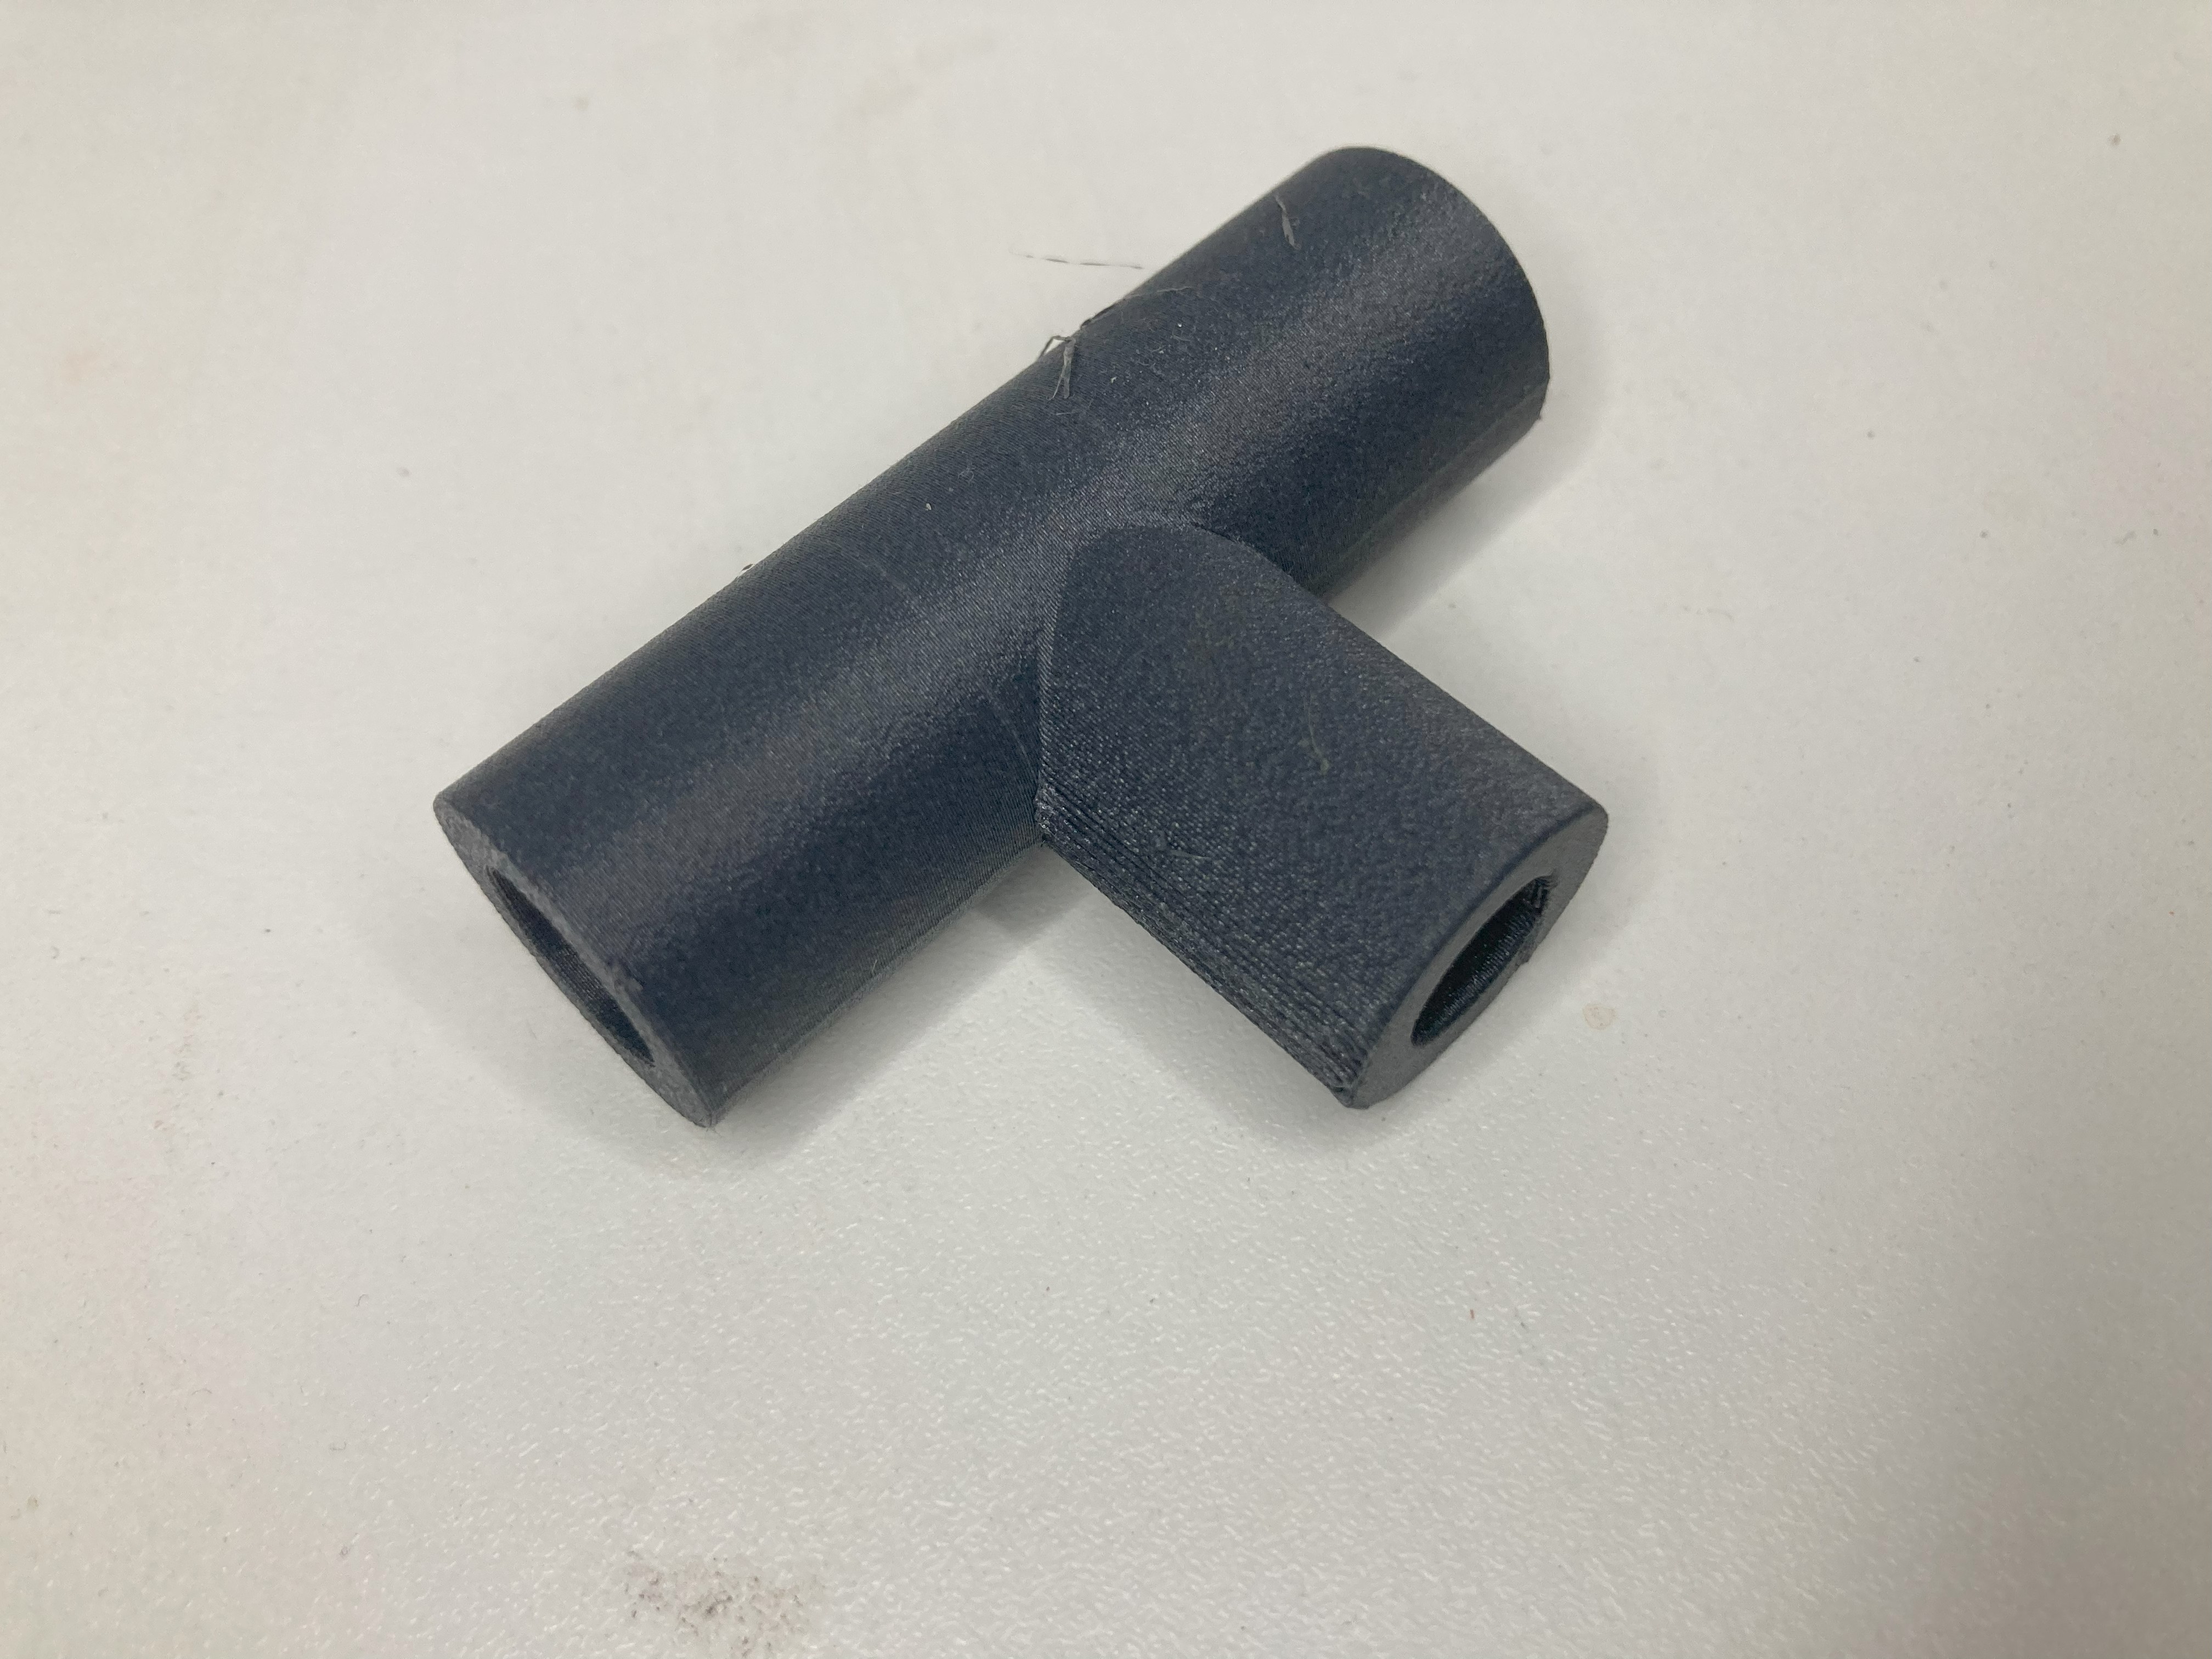
T-Stück 3D drucken: Parametrischer Schlauch-/Rohr-Adapter für deine Maße
With our generator you can create a T-piece exactly according to your requirements: Innen-/Außenyourchmesser (ID/OD) and Lengths set, check preview, export STL and in Profiqualität 3D printed.
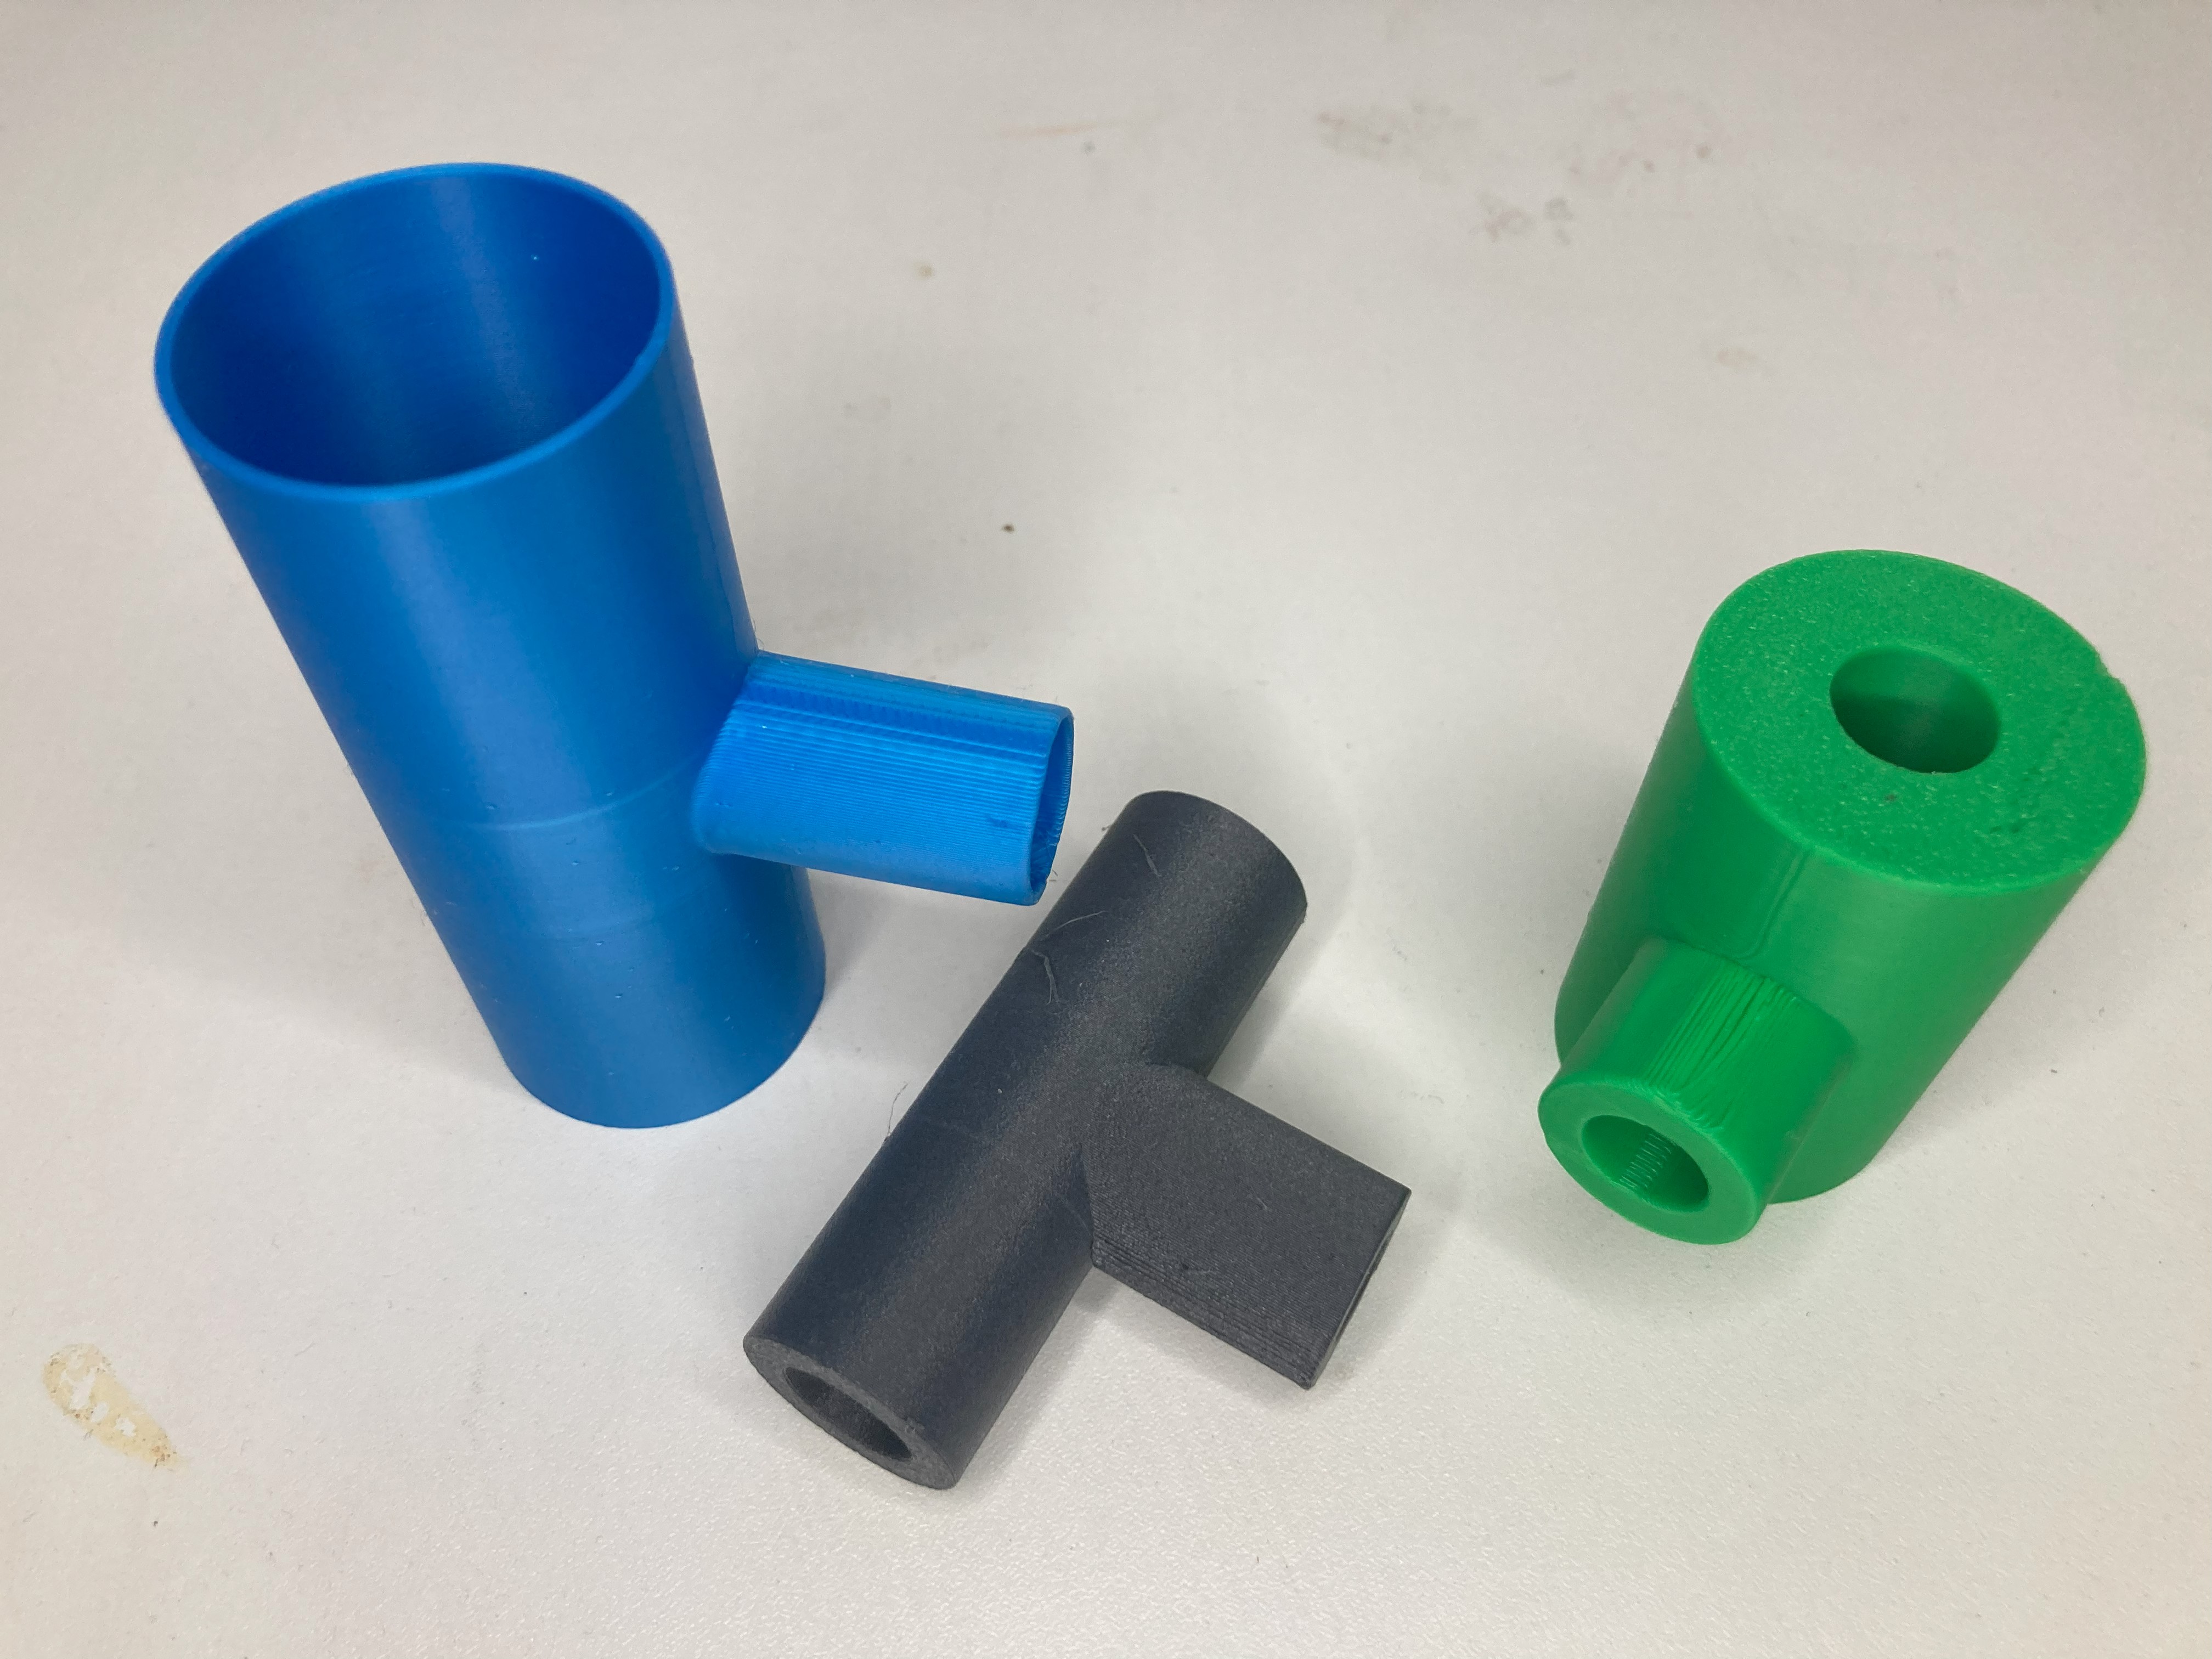
Use cases & Advantages
- Hose manifold for workshop, aquaristics, suction, pneumatics (low-pressure).
- Rohr-adapter für prototypes & Versuchsanordnungen.
- True to size without CAD: ID/OD and Längen frei definieren, Varianten in Minuten.
parameters im Überblick (ID/OD & Länge)
| parameters | Description | Example |
|---|---|---|
x_l | Length main tube (X-axis) | 60 mm |
x_od | Außenyourchmesser Hauptrohr | 20 mm |
x_id | inner diameter Hauptrohr | 12 mm |
z_l | Branch length (Z-axis) | 30 mm |
z_od | Außenyourchmesser Abzweig | 18 mm |
z_id | inner diameter Abzweig | 10 mm |
Make sure that the wall thickness (OD - ID) / 2 at least ~1.2 mm beträgt; für robuste parte lieber 2.0-3.0 mm.
Fits & tolerances (plug-in/press fit)
| Kind | Reference value (ID vs. tube OD) | Note |
|---|---|---|
| Press fit | ID = Tube OD - 0.10...0.20 mm | Nur bei exakt kalibriertem printer; ggf. leicht erwärmen. |
| Plug fit | ID = Tube OD + 0.20...0.40 mm | Gut lösbar, dichtet with Klemmschelle. |
| Sliding seat | ID = Tube OD + 0.40...0.60 mm | Für Yourchleitungs-/Testaufbauten. |
Indicative values for FDM; vary depending on printer, nozzle, material and calibration.
printtipps & materials
- material: PETG (tough), ASA (UV/outdoor), PLA for prototypes. For sealing lips: Print TPU separately.
- Layer height: 0.16-0.24 mm; Perimeter: 4-5 for pressure-bearing walls; infill: 20–40 %.
- Alignment: Hauptrohr horizontal, Abzweig nach top; inner möglichst wenig support.
- Rework: Lightly deburr; finely sand sealing surfaces if necessary.
Step-by-step to STL
- Tube/pipe Outer Ø (OD) & if applicable. Inside Ø (ID) measure (calipers).
x_id/z_idanhand gewünschter Passung wählen (Tabelle top).x_od/z_odso that the wall thickness is ≥1.2 mm.- Lengths
x_l/z_laccording to assembly requirements. - preview prüfen → STL exportieren → print beauftragen.
OpenSCAD-Snippet (core logic)
// T-piece automatically generated x_l = 60; x_od = 20; x_id = 12; z_l = 30; z_od = 18; z_id = 10; $fn = 100; difference() { union() { // main pipe (X-axis) translate([-x_l/2, 0, 0]) rotate([0, 90, 0]) cylinder(h = x_l, d = x_od); // branch (Z-axis) cylinder(h = z_l, d = z_od); } // Inner bore X translate([-x_l/2, 0, 0]) rotate([0, 90, 0]) cylinder(h = x_l, d = x_id); // Inner bore Z cylinder(h = z_l + 0.2, d = z_id); }The differentiated inner bore produces clean channels; the +0.2 mm at the branch helps to avoid steps.
FAQ
Can the T-piece withstand pressure?
For Low pressure and media without high temperatures. For compressed air/high pressure please specify - we advise on material/wall thicknesses or alternative procedures.
How do I make it denser?
Use push-fit with clamp, print TPU sealing rings or use sealing tape. More perimeter increases tightness.
Can I mix hose sizes?
Yes - set x_id/x_od and z_id/z_od different. Ensure sufficient wall thicknesses.