

Mounts and Brackets ·
Custom Pipe Clips: Configure a Wall-Mounted Holder for Your Exact Diameter
Standard pipe clips do not always fit unusual diameters. Learn how to measure a pipe, choose clip thickness, width and screw-hole diameter, then create a custom STL or order a 3D-printed holder.
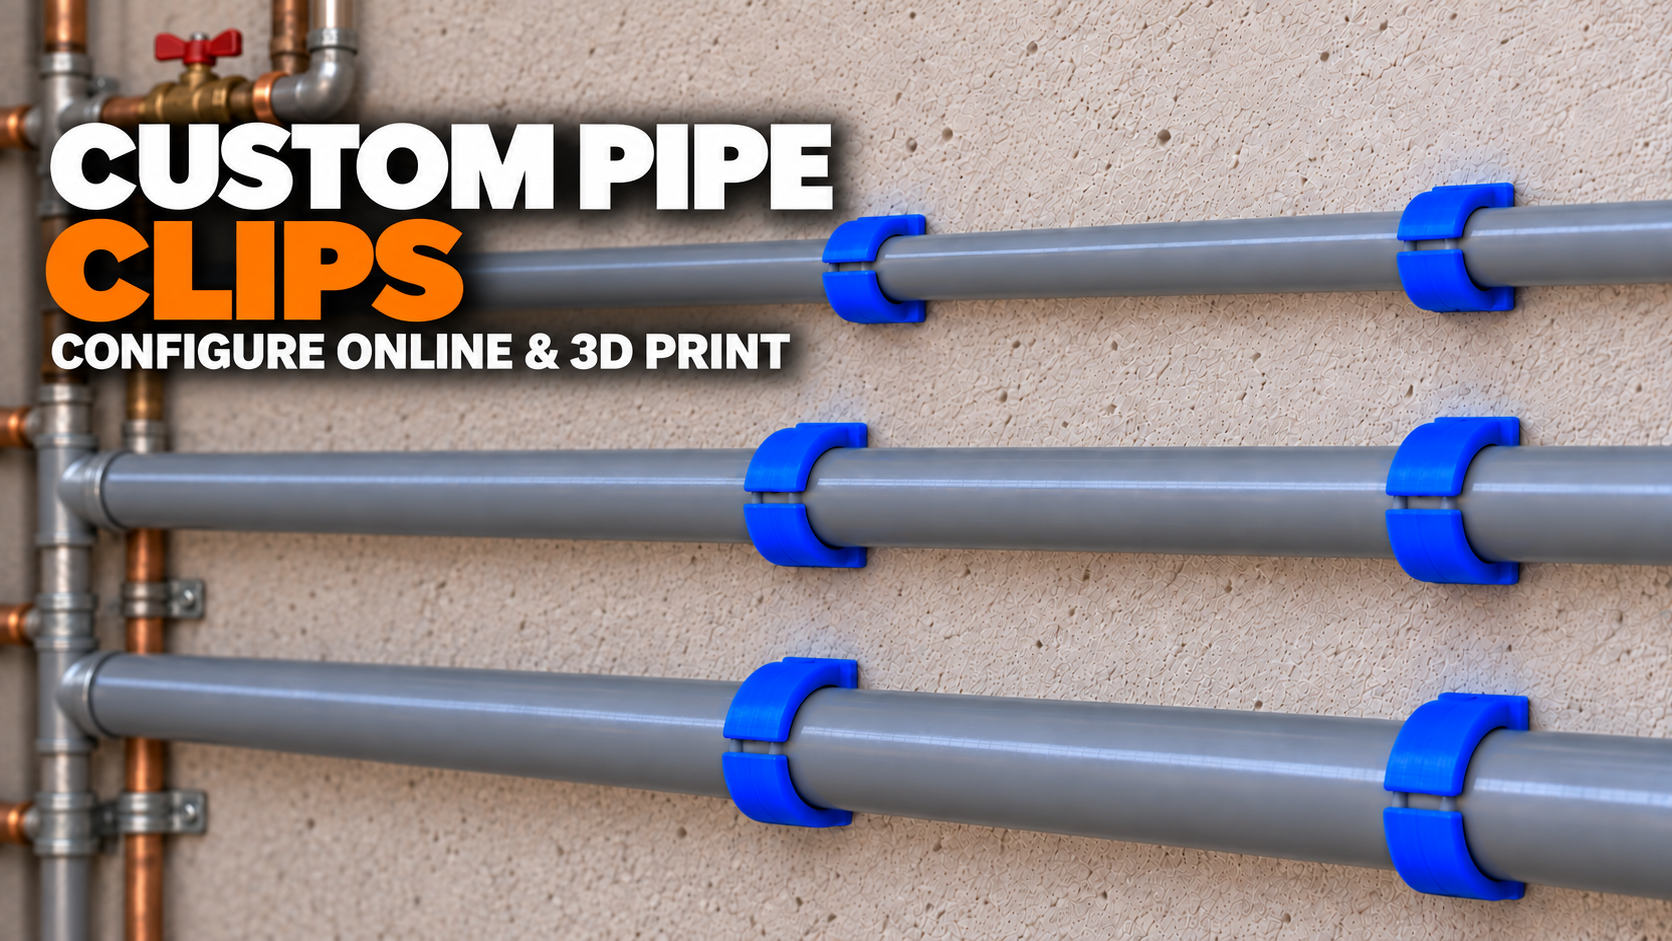
A pipe, hose or cable conduit needs to run neatly along a wall, but the available clip is slightly too loose, too tight or made for the wrong screw. This is common with older installations, non-standard tubing, workshop equipment, prototypes and DIY projects. A few millimetres can decide whether a clip holds securely or cannot be installed at all.
The custom pipe clip is a configurable C-shaped wall holder. You enter the actual outside diameter, adjust the clip wall thickness and width, and select the screw-hole diameter. The generated model can then be downloaded as an STL for your own printer or ordered as a finished 3D print.
Configure a pipe clip for your diameter
Enter four measurements, inspect the 3D preview and create a holder for your project.
When is a custom pipe clip useful?
The design is intended for light-duty, non-safety-critical mounting and organisation tasks. Typical applications include:
- routing lightweight plastic pipes and electrical conduit along a wall,
- holding hoses in a workshop, garage or utility room,
- organising cable sleeves and round cable bundles,
- mounting tubes on shelving, test rigs and machine covers,
- building prototypes and model-engineering projects,
- replacing a discontinued clip with an unusual diameter.
This is not a certified pipe clamp for gas, pressure, heating, fire-protection or other safety-critical systems. The suitability of the geometry, printed material, screw and wall fixing must be assessed for the real installation.
The four configurable dimensions
| Parameter | What it controls | What to check |
|---|---|---|
| Pipe diameter | The inside diameter of the C-shaped receiving area | Measure the actual outside diameter of the pipe, hose or conduit |
| Clip wall thickness | The material thickness of the flexible clip arms | Affects stiffness, strength and insertion force |
| Clip width | The contact width along the pipe axis | Affects guidance, space, print time and material use |
| Screw-hole diameter | The central hole in the flat wall-mounting base | Must suit the selected screw and fixing method |
After changing a value, allow the 3D preview to update and inspect the complete part. Check the inner opening, front snap gap, flat rear mounting surface and overall dimensions before downloading or ordering.
How to measure the pipe diameter correctly
The important value is the actual outside diameter, not the nominal pipe size. A digital or vernier calliper normally gives the most useful result. Measure at several points because a pipe can be slightly oval, coated, painted or worn.
Do not squeeze a flexible hose with the calliper. Record its relaxed diameter at the intended mounting position and consider whether it changes during operation. A cable bundle may not be perfectly round; if it changes shape easily, a dedicated cable holder may be more suitable than a rigid circular clip.
Nominal labels such as 20 mm, 25 mm or 1 inch do not necessarily describe the outside diameter. Pipe standards, wall thicknesses and hose naming conventions vary, so measuring the real item prevents most fit problems.
How tight should the snap fit be?
There is no single clearance value that works for every printer and material. Printer calibration, extrusion width, layer height, material shrinkage and part orientation all influence the finished opening. The required fit also depends on whether the pipe will remain installed or needs to be removed regularly.
If the fit is too tight, inserting the pipe can overstress the arms or crack the clip at the opening. If it is too loose, the pipe can rattle, slide or leave the holder. For a larger installation, make one short test piece first and verify the fit on the real pipe before producing the full quantity.
Clip thickness and flexibility
The two C-shaped arms must open far enough for the pipe to pass through the front slot and then spring back around it. Increasing wall thickness can improve rigidity, but an excessively thick clip may require too much insertion force. A very thin clip may flex easily but provide insufficient retention or creep under continuous load.
Material, temperature, clip width, front-gap geometry and print-layer direction are just as important as nominal thickness. The configurator creates a tailored geometry; it cannot replace a practical test under the real operating conditions.
Choosing the clip width
Clip width runs along the axis of the pipe. A wider holder provides a larger contact area and better resistance to tilting. It also consumes more material and needs more clear wall space. A narrower clip can be useful in compact assemblies but may guide the pipe less effectively.
For a long pipe run, several correctly aligned clips are normally better than one unusually wide holder. Clip spacing depends on the pipe's stiffness, weight, orientation, temperature, vibration and the loads applied during use. Avoid placing clips so close together that small alignment errors force the pipe into a bend.
Selecting the screw and wall fixing
The configured hole must match the intended screw, but hole diameter alone does not determine the strength of the mounting. Screw-head size, washer, plug, wall construction and edge distance also matter. Wood, masonry, plasterboard and sheet-metal panels each require a suitable fixing method.
Before drilling, check for concealed electrical cables, water pipes and other services. Mount the clip with its flat rear face fully supported and tighten the screw only enough to seat the part securely. Excess torque can crush or split a printed mounting base.
PLA, PETG, ASA or nylon?
- PLA: easy to print and useful for prototypes or simple indoor fixtures, but limited where heat or repeated flexing is expected.
- PETG: a practical choice for many indoor workshop applications because it is generally tougher and less brittle than standard PLA.
- ASA: may provide improved heat and weather resistance, provided it is printed under suitable conditions.
- PA/nylon: can offer good toughness and fatigue behaviour but requires careful drying, printing and dimensional control.
Material selection must account for temperature, UV exposure, chemicals, vibration and the expected number of insertion cycles. Choosing a tougher filament does not make the clip approved for pressure systems, vehicles or safety-related installations.
Printing and inspection
Open the generated STL in your slicer and verify the units, scale, wall count, layer height and bed contact. An orientation with the flat rear surface on the build plate may provide stable printing and a clean mounting face, but the final setup should always be checked for your printer and material.
Inspect the sliced preview around the front opening and the transition between the C-shaped body and mounting base. After printing, remove strings and burrs without changing the retaining edges. Reject parts with cracks, incomplete layers, poor bonding or a damaged screw hole.
Wall mounting step by step
- Measure the real outside diameter and plan the pipe route.
- Configure the clip and inspect the generated 3D preview.
- Print or order one test clip and confirm the snap fit.
- Select the correct screw, plug and fixing method for the wall.
- Mark a straight line and position the clips with sensible spacing.
- Fix each clip with its flat rear surface against the wall.
- Press the pipe evenly through the forward-facing slot and check that it is seated without stress.
All holders in one run should be aligned before the pipe is inserted. Offset clips can bend the pipe, create continuous side load and make individual clips fail earlier.
Create a pipe holder instead of adapting the pipe
Configure the holder around the measured outside diameter, then download the STL or order the printed part.
Frequently asked questions
Can I use the clip for a flexible hose?
It may suit a light-duty hose if its diameter remains stable and the clip does not crush it. Measure the hose at the mounting point and test one sample first.
Can it hold electrical conduit or cables?
It can serve as a simple guide for suitable conduit or a round cable bundle. It is not a certified electrical fixing, insulation component or strain relief, and it must not damage the cable jacket.
Should I enter the nominal or outside diameter?
Enter the measured outside diameter. Nominal pipe sizes often differ from the real external dimension.
Can the clip be used outdoors?
That depends on the selected polymer, UV exposure, temperature range, moisture and load. The material and design must be validated for the actual environment.
Is it suitable for pressurised pipework?
No pressure, load or safety approval is provided. Do not use it as a safety-relevant support for gas, pressure, heating or fire-protection installations.
Can I download the STL and print it myself?
Yes. Configure the four dimensions, inspect the model and use the generated STL in your slicer. You can alternatively order the configured part as a 3D print.
Conclusion: measure the real pipe before creating the clip
A custom wall-mounted pipe clip is useful when a standard clamp does not match the actual diameter or mounting screw. The best result starts with an accurate outside-diameter measurement, an appropriate clip thickness and width, and a fixing method suited to the wall.
Test one clip on the real pipe before producing a complete set. That simple step confirms the snap action, retention and installation spacing while changes are still easy to make.